In the Fall Creator’s update, one item that flew under many people’s attention was that Samba v1 was disabled, so that Windows 10 won’t map SMB network drives using that version of the protocol.
We had tested build 1709 of Windows 10, aka “Fall’s Creator Update”, and everything seemed good to go. In fact, 1703 was beginning to cause us more than a couple of issues. However, what we had not counted on was that a fresh install would behave differently than an upgrade, and that difference would be intentional. Continue reading “Windows 10 Won’t Map SMB Network Drives”→
Windows 10 is really, really getting on my nerves of late. I booted up this morning so I could use Skype and ended up missing the call because the system was sooooo sssssssllllllloooooooowwwww. Well, after 20 minutes, I just hard shutdown and went to work on doing updates.
But, of course, it cannot be that easy. Again! Windows decides it is the only OS on the system and sets the system to boot to only itself. Mind you, all this is going on while I’m sick and wanting to be just in bed staring up at the ceiling in between coughs and sniffles. So, I could vaguely remember the fix was easy, but I could not remember what it was.
Then, I found “Fix Grub Not Showing For Windows 10 Linux Dual Boot” tucked away in my Instapaper links. It was almost exactly what I needed! However, different systems put their UEFI files in different places (so much for “universal”, huh?), and I wasn’t sure where to put mine when I setup the system, so I know I put it in an odd place, naively thinking I would never need to look again. So, I poked around and found it. The command is:
How to mount ISO file in Windows 10 after a program changes the file association.
I use 7Zip for most of my compression needs on Windows 10. However, after installing it, it changes many file associations, including .ISO, to itself. Here is how to revert it back so you can mount ISO file in Windows 10 the normal way.
We had a recent spate of Internet Explorer opening multiple tabs to the point of exhausting computer memory, and it seemed exclusively Windows 10 boxes. Turns out that a new “feature” that you didn’t ask for is the cause.
I got a weird call from another tech saying that a user’s Internet Explorer was opening multiple tabs, over and over again, until the system came to a crawl because it was running out of memory. Killing IE, if possible, else a hard reboot seemed the only options.
This was puzzling. It was really weird because it was a new system, so it must’ve been a new record if they downloaded something to cause the behavior. Normally, I would immediately suspect adware, spyware or a rogue toolbar. Turns out that the latter wasn’t so far from the truth. The problem is that a new “feature” of Windows 10 was to add an “Edge” tab to Internet Explorer. Microsoft really wants you to use Edge, and apparently haven’t learned from turning so many people off on trying to force Windows 10 upon them.
I keep wondering what it will take for the corporate world to wake up and move to open source software, where you can, if willing, customize the software all day long and not be held hostage by closed systems like MS Windows.
At any rate, 9/10ths of the time, you can fix the issue by going into Internet options and cleaning up the cache files, resetting Advanced settings and resetting IE completely, in that order. In the remaining cases, removing all temp files for all users with a utility like TFC did the trick.
Obviously, I had nothing better to do this weekend than to deal with how much Windows 10 endless update cycle sucks.
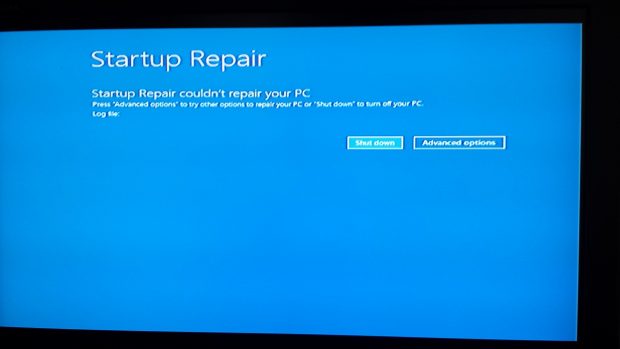
The endless spiral of death
I keep hearing how “Windows 10 isn’t that bad,” but here is one of my predictions coming true before my very eyes!
The minute I read Microsoft’s pronouncement that you can no longer hide updates, I predicted that someone (not necessarily me, mind you, but so be it) would have a really hard time with this because it would obviously go into a spiral if an update failed. Well, the above screen tells you all.
Now I just need to replace my TV card so I put Linux on this thing. Seriously.
Microsoft recently introduced Bash on Ubuntu on Windows 10 for developers. Does it work?
Not long ago, I was unable to use TeamViewer to remote into my laptop to use ssh. So, I attempted to install putty and other tools in order to ssh into a server from a Windows 10 machine. My disappointment in how it worked was even larger than I would have anticipated.
It seems weird that we are decades into using the Internet, and Windows tools still really lack at doing server support. Apparently, I am not alone, though, and Microsoft has included a bash shell from no less than Canonical, the company behind Ubuntu, in their latest developer release.
And, I even heard it would support ssh.
This gave me a burning desire to at least give it a try.
The downside is that I had to get my computer back onto the Windows Insider Program, which meant re-enabling a lot of the more chatty portions of Windows 10 that were locked down for privacy reasons. However, that’s part of the deal that you are supposed to give feedback and such as part of the program, so this is actually a case where some of these otherwise intrusive elements makes sense.
Well, I finally got the Insider preview installed, and I enabled the Subsystem for Linux (Beta). You can read more about the entire procedure at FossBytes‘ “How To Install And Run Bash On Ubuntu On Windows 10 Right Now“. I opened a command prompt and typed “bash” and pressed [Enter]. The installation took a little longer than I had anticipated, but a while later I had an actual bash shell.
OK, but is this anything like opening a terminal in Linux? Can I really ssh and paste a password into the shell instead of typing everything on the command line like it’s 1993?
Sure enough, I opened a browser and copied the password from LastPass and pasted it into the bash window and I was on! Not only did ssh work, but the entire command window behaved similarly to a terminal window in Linux!
OK, I’m not giving up Arch tomorrow, but at least if I’m stuck on a Windows box, I can at least use familiar tools and not have to rely upon programs that simply don’t live up to the expectations.
“Should I switch to Windows 10?” is a question a get a lot. Here’s how to find out.
“Should I switch to Windows 10?” For a lot of people who ask this question, they are really asking whether or not they should upgrade their current computer running Windows 7, take the time to learn a new user interface (that frankly is often half-baked) and take a chance that the programs they currently are now using will either no longer work at all or will need an upgrade.
These are my notes from working on Windows 10 UEFI SCCM boot images. They are the result of experimentation, so take everything with a grain of salt and realize everything is subject to change.
[Last Updated: 1 Jan 2017]
Reference Computer & Capture
Ensure that the SCCM capture media boots via UEFI in case it needs to reboot. Turn off Enable Legacy Option ROMs in the BIOS just to make sure.
Apparently, there is an issue with the size of the EFI partition if the default is used. Create partitions either from another image or from Linux and apply them and then install Windows 10. This will ensure that both Recovery and operating system directories are correctly captured and applied.
You should have “Capturing volume 1 of 2” and “Capturing volume 2 of 2” for task sequence “Capture the reference machine”, else you may have not booted UEFI before the capture. If instead you get “Capturing volume 1 of 1”, check boot settings and uncheck any Windows Manager entries.
Update:
I should state that when it did capture multiple partitions, it did so inconsistently. It was more or less every other time it would capture 1 — 2 and 2 — 2 vs 1 — 1. However, the server guys ran a patch a few months ago, and it now only does 1 — 1 period. I suspect that you might be running the same patch level.
Having said that, UEFI and Windows 10 still works. Since that was more or less what the article was about, I suppose you can quit reading after this paragraph because all you have to do is in your task sequence for deployment, you still create the partitions for EFI, etc, in Format and Partition Disk and simply deploy your image to the last partition (or OSDisk). You honestly don’t seem to lose anything unless you try to use Windows 10 Reset your PC option, as testing it out had it working the first time on a given computer only.
Some details of what I’ve learned since writing the original article:
1. Somewhere along the way, SCCM stopped capturing multiple partitions. There are ways to force it, but using the simplest create capture media no longer does it at all that I can tell. Even when it did work, it was inconsistent at best. It appeared to, more or less, capture 2 partitions every other time (but not always).
2. SCCM does not natively like multiple partitions. Sure, it can create them, but there are workarounds all over the web to do anything meaningful with them beyond that. Most of the time, the advice is to simply use something else if you really, really want to create and deploy multiple partitions.
3. If you simply want a UEFI boot, simply create the appropriate partitions in the Format and Partition Disk step and then deploy your OS image to OSDisk. Apparently, it is Windows 10 and the BIOS that will handle the UEFI without further ado. In the worst case, the Dell BIOS allows you to force UEFI, and some machines work better with legacy disabled. Forcing the Dell BIOS into UEFI mode and disabling legacy mode on some models, booting UEFI on the USB task media stick, creating the proper partitions and deploying Windows 10 to the last partition all seems to make it work fine.
4. SCCM especially does not like multiple OS partitions, and so we are testing it out by using two already existing images and deploying them using two different task sequences (and then manually running bcdboot if we want the boot menu). Doing otherwise either has the second OS overwriting the first or the entire sequence stopping after the first is configured. Obviously, we put the Format and Partition Disk step in the first task sequence but not in the second.
Under Apply Network Settings, add an entry for Network Settings and be sure to put in the suffix “domain1.ci.longmont.co.us” on the DNS tab.
Under the Setup Operating System, add “Run Command Line” step “Disable DEP”. In the Command line section, put “bcdedit /set nx alwaysoff”. On the Options tab, place a checkmark by Continue on error.
For deploying the image, in the Apply Operating System task sequence step, though, you only need the 2 – 2 image of the captured image package (.WIM) file. Do a Apply Data Image task for the recovery partition (1 – 1).
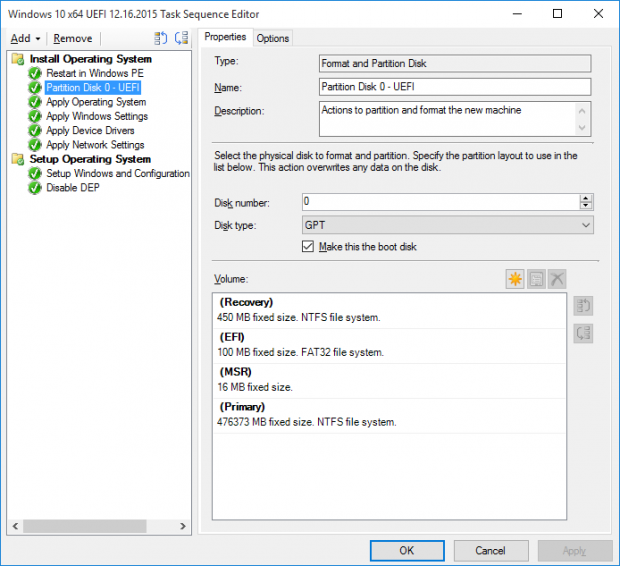
Partition layout should look something like:
SCCM task sequence create partitions for UEFI Windows 10 deployment
Task sequence will not install on an unpartitioned drive. Create a 450MB Recovery partition (NTFS) and a 100MB EFI partition (FAT32) at the beginning of the disk. The rest can be named anything and formatted NTFS.
Note that the recovery partition is not required. Some things might act wonky without it, but if you can dump it, I suggest you do so. SCCM is a royal pain when it comes to capturing both partitions.
Note the sizes. I believe some of the pain I encountered was due to an illegal partition size created by Windows OOB. Somehow create the Recovery and EFI partitions and then install Windows.
Boot Image Issues
If you create a task sequence with an x86 boot image but the stick is booting x64, then the UEFI SCCM task sequence will attempt to copy down the boot image called for. Unfortunately, it does this on its own and before the task sequence begins. Of course, the task sequence partitions and formats the hard drive, so the boot image is immediately lost. You can tell it will copy down the boot image because SCCM will ask you to reboot before running the actual task sequence.
If you change an x86 task sequence so it has a UEFI SCCM x64 boot image on a stick created with an UEFI x64 boot image, it will not copy down the boot image, which gets around that particular problem. However, the end result will be a non-bootable system, it would appear.
All of the documentation I have found state that you need to use an x64 boot image to deploy 64 bit systems and an x86 boot image to deploy 32 bit systems. Since we have been deploying 64 bit systems with an x86 boot image in the past (MBR only, naturally), it would appear we were simply lucky.
In general, it seems that the initial capture of an x64 UEFI image will only capture the main partition. However, if you use that image to gen the main partition of a working UEFI system, you can then sometimes get the capture task sequence to capture both restore and main partitions. [See update previous.]
I still believe it is related to the missing TSMBAutorun.exe on the capture stick. There is supposed to be one under each of the i386 and x64 subdirectories of SMS, but only the i386 subdirectory has it.
It seems that a problem that plagued beta versions of Windows 10 has crept into the mainstream. I am convinced that there is an update that causes this, although, because we no longer have control over updates, it is really difficult to know which one. Essentially, the start menu works when you first install it, but somewhere along the line Windows 10’s Start Menu quits working. Continue reading “Windows 10’s Start Menu Quits Working”→